I have been using a lot of TP-Link products from the Omada series, and deployed the omada controller for centralization of the configuration (mostly for VLan configuration and wireless management). In some cases, I ended up having issues with the wifi roaming, or with the configuration because I was restarting the proxmox node on which the controller was running and no configuration could be provided.
Luckily version 6.x of the controller drastically improved the high-availability mode, offering either active-backup or clustered mode. Since the memory usage is a bit high, clustered mode is out of the picture for now (at least 3 nodes are recommended), but active-backup is working well enough.
This post describes how to install the controller in LXC (but this could also be done in a VM). The following container configuration is considered, but it can be adjusted to ones needs:
- vCPU: 4
- memory 4GB (6GB would be recommended by TP-Link)
- storage: 32GB (I do not use an omada gateway, therefore statistics volume can be reduced)
Create as many interfaces as needed in the container, I usually go with 3
- default VLAN (1) for devices that were not yet configured through Omada and will pick up an untagged interface as the main one
- VLAN for device management, with restricted access to the internet
- VLAN for application management on which the controller UI will be accessible
I run debian trixie in my LXCs, but that's because of my own familiarity. Any other debian-based distribution should be convenient to use since TP-Link offers a pre-built debian package. Other distributions will rely on a tar.gz archive.
Step 1: install MongoDB
Omada requires MongoDB as storage backend, and does not bundle it in the installation package. There are packages for MongoDB CE available for debian, and the installation is straightforward. The application is flexible, and can run from MongoDB 3.0 until 8.1. We will install 8.1 for the latest version
curl -fsSL https://pgp.mongodb.com/server-8.0.asc | \
  gpg -o /usr/share/keyrings/mongodb-server-8.0.gpg \
  --dearmor
Create new /etc/apt/sources.list.d/mongodb.sources file with the following content
Types: deb
Suites: bookworm/mongodb-org/8.0
Components: main
Signed-By: /usr/share/keyrings/mongodb-server-8.0.gpg
URIs: https://repo.mongodb.org/apt/debian
At the time of writing, the trixie repository does not contain all required packages, therefore the bookworm one is being used.
apt update && apt install mongodb-org --no-install-recommendsStep 2: install omada
Install first all additional dependencies
apt install curl jsvc openjdk-25-jre-headless --no-install-recommendsDownload latest version of omada controller (6.2.0.17) from their website
wget https://static.tp-link.com/upload/software/2026/202604/20260402/Omada_Network_Application_v6.2.0.17_linux_x64_20260331104746.debInstall the controller. As trixie no longer supports OpenJDK 17, we need to force the installation with the unresolved dependencies.
dpkg -i --force-all Omada_Network_Application_v6.2.0.17_linux_x64_20260331104746.debExpect some time with the application initialization
# dpkg -i --force-all Omada_Network_Application_v6.2.0.17_linux_x64_20260331104746.deb
Selecting previously unselected package omadac.
(Reading database ... 23689 files and directories currently installed.)
Preparing to unpack Omada_Network_Application_v6.2.0.17_linux_x64_20260331104746.deb ...
Cannot locate Java Home
Unpacking omadac (6.2.0.17) ...
dpkg: omadac: dependency problems, but configuring anyway as you requested:
omadac depends on java17-runtime | java17-runtime-headless | jdk-17; however:
 Package java17-runtime is not installed.
 Package java17-runtime-headless is not installed.
 Package jdk-17 is not installed.
Setting up omadac (6.2.0.17) ...
Install Omada Network Application succeeded!
==========================
current data is empty
Omada Network Application will start up with system boot. You can also control it by [/usr/bin/tpeap].
check omada
Starting Omada Network Application. Please wait.
..............
Started successfully.
You can visit http://localhost:8088 on this host to manage the wireless network.
========================
Verify you can access the controller at https://[controller-ip]:8088
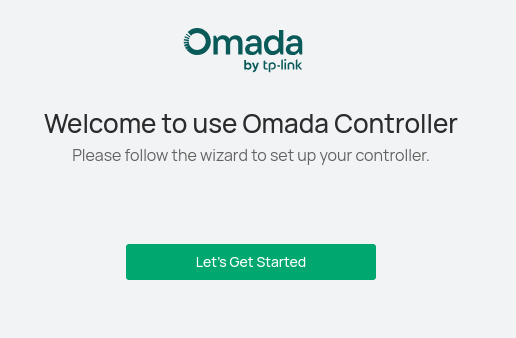
At this stage, no further actions are taken on the controller, we'll polish the infrastructure first
Step 3: Proxmox firewall rules (optional)
To ensure access to the services, firewall rules must be created. An up to date listing of the required ports is available on the Omada website: https://support.omadanetworks.com/us/document/13090/
Since the rules will be copied on multiple instances or multiple interfaces, it is more convenient to create a security group rather than create individual rules
To access the Web UI:
- TCP 8088
- TCP 8043
- UDP 27001 (if using the omada app)

Device discovery and management
- UDP 29810
- TCP 29811
- TCP 29812
- TCP 29813
- TCP 29814
- TCP 29815
- TCP 29816
- TCP 29817

The groups can then be applied distinctively to each needed interface

Step 4: clone container
At this stage most of the work is done in the first node, rather than running all the configuration again, we can simply clone the container to our second node in the cluster.
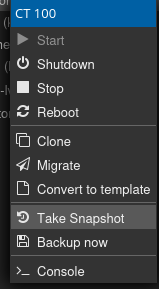
First, if the container is running, a snapshot must be taken
Then the container can be cloned to the second node
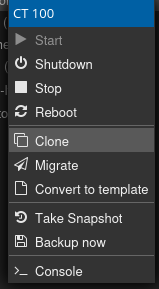
If the container is not using ceph or NFS, the clone must first be done on the current node, and the migrated to the second node. This can take some time depending on your network speed (note that migration occurs over SSH, transfers could be CPU-bound).
Once the transfer is completed, verify or modify the network configuration, as the IP address is copied from the source container.
Once the container starts, the ssh keys must be regenerated as they are the same as the source container
root@omada02# rm -f /etc/ssh/*key*
root@omada02# ssh-keygen -A
root@omada02# systemctl restart ssh
The target node must support the same instruction set as the source node, otherwise MongoDB will not start. If omadac fails to start with a message like Failed to start the MongoDB server with exit code 132. Please check your system memory, disk space, maximum number of open file handles, and file permissions., it is likely the CPU is missing AVX instructions, therefore a version <5.0 must be installed.
Step 5: troubleshoot clone startup
I could not get the clone to start, it was having some trouble connecting to MongoDB. At this point, the culprit is MongoDB > 4.4 that cannot run on a non-AVX cpu (my replica would be on a Denverton CPU that has no AVX support)
- Log in to post comments